The following procedure describes how to set up and monitor a Trimble R750 Base as an Internet Base Station Service (IBSS) using Works Manager
This assumes the R750 has an internet connection (LTE, WiFi or Wired Ethernet)
Organization / Account
Select your Works Manager account
Open the Account Details to find the ‘Short Organization Name’. This is the TCC Organization for the R750 IBSS Server configuration.

Configure the R750 IBSS Server


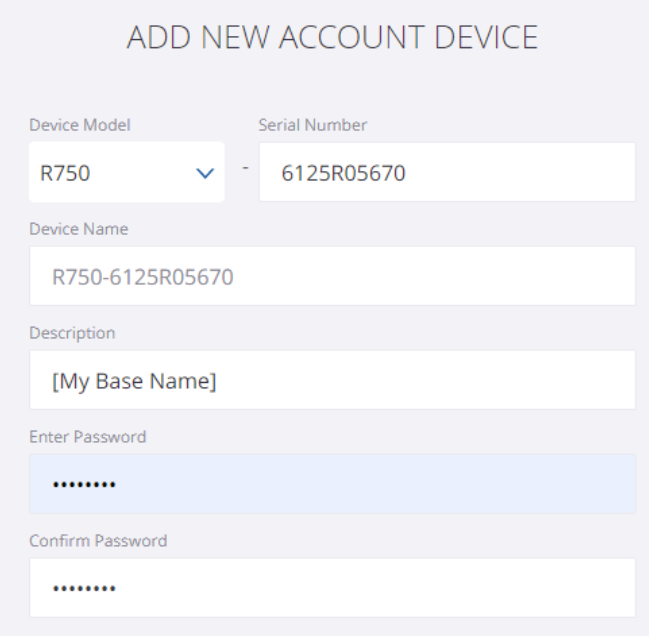
Device Model must be R750 [Other GNSS models are also supported]
Serial Number must match in R750 and WM
Device Name in WM must be the same as TCC Device ID in R750
Password must be the same in R750 IBSS Server and WM
Multiple Correction Streams
The same R750 IBSS Base can be configured with up to 3 different correction streams (mountpoints) to support CMRx, CMR+ and RTCMv3

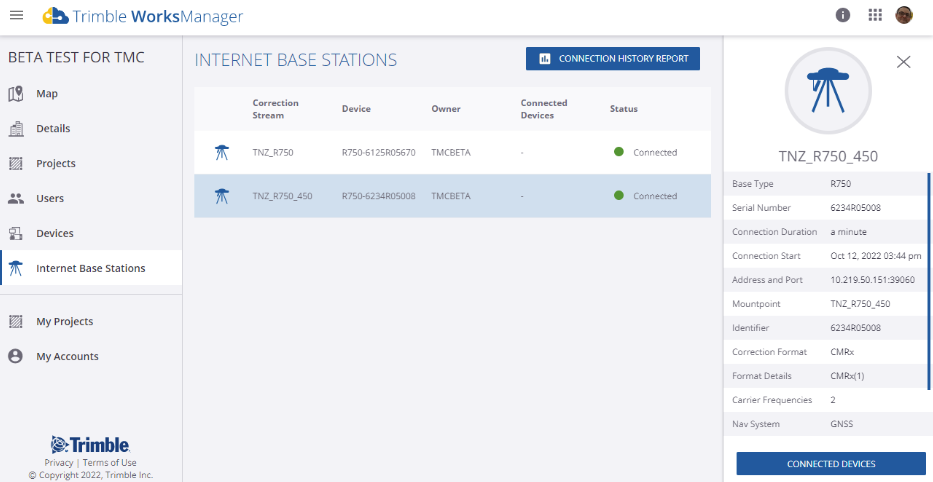
When Works Manager detects an incoming IBSS Server stream from a device registered in your account it will list it as an Internet Base Station Correction Stream.

The Reference Station - Station Name will be suffixed with ‘CMR’ for CMR+ or ‘RTCM3’ for RTCMv3 to create the different Correction Stream (mountpoint) names.
No suffix is added for CMRx Correction Stream

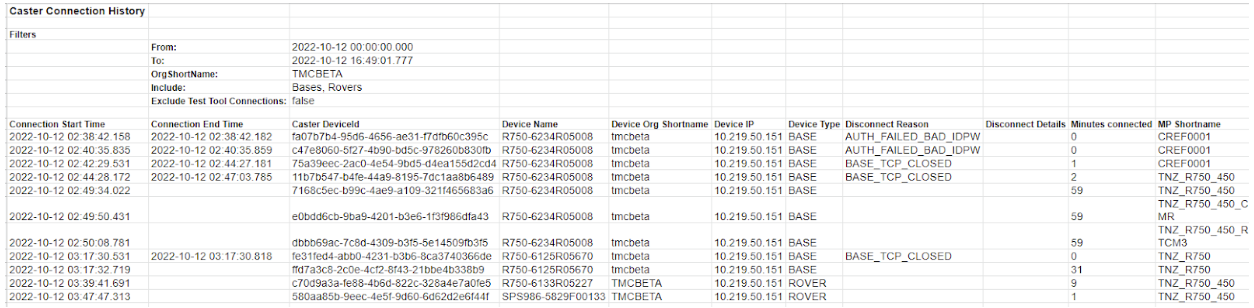
Status Information
The current status, connected devices and a connection report are available.

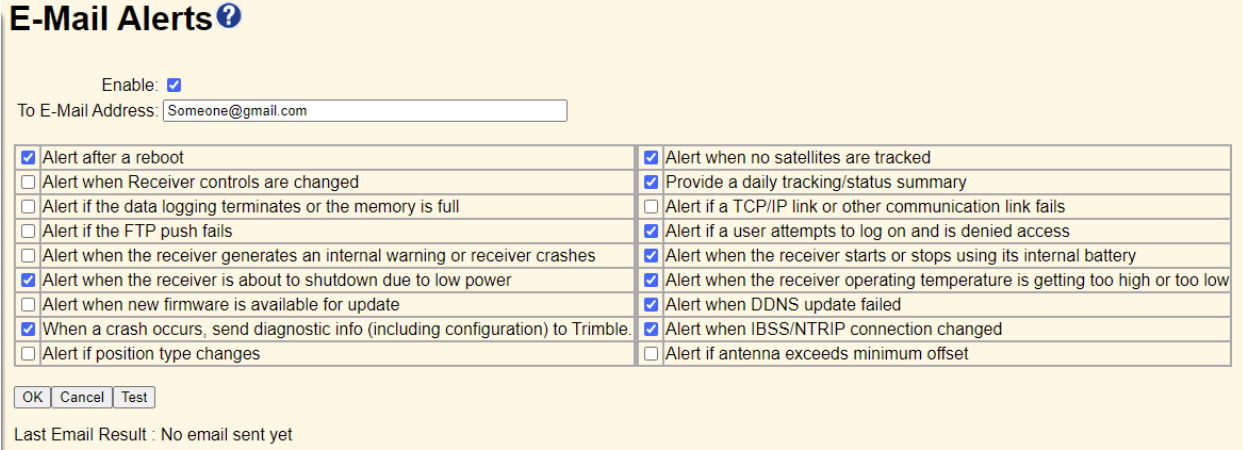
Notifications
Email notifications can be set up using the Network Configuration tab in the R750 web UI.

Using a Gmail E-Mail Client
Use the following settings for a Gmail account.
E-Mail Authorization Required – Select this check box
SMTP Server – Enter ‘smtp.gmail.com’
SMTP Port – Enter the SMTP port 465
Enable SSL/TLS - Select this checkbox to enable security
From E-Mail Address – Enter the Gmail address
E-Mail Login Name – Enter the Gmail address
E-Mail Login Password – Enter the App password (see below)
Verify Password – Enter the App password
Create & use App Passwords
Creating an App Password.
- Go to your Google Account.
- Select Security.
- Under "Signing in to Google," select App Passwords. You may need to sign in. If you don’t have this option, it might be because:
- 2-Step Verification is not set up for your account.
- 2-Step Verification is only set up for security keys.
- Your account is through work, school, or other organization.
- You turned on Advanced Protection.
- At the bottom, choose Select device and choose Other (Custom name) then add your custom name eg. ‘Trimble R750’
- Click on Generate.
- The App Password is the 16-character code in the yellow bar..
- Copy and paste into the Web UI E-Mail Login Password and Verify Password fields
- Tap Done.