The April 29, 2020 release of the Trimble Connect 3D Viewer introduces a new feature for the Trimble Connect Workflow Extensions - User Guide: the property sets access control.
Contents
Overview
With the new property sets access control feature, project admins can define the access level for each property set in the library for each user group separately. The new access control permissions model replaces the previous one with new access levels. It is possible to choose from three different access levels: Edit access, Read only access, and No access.
How to Apply the New Permission Model to an Existing Property Set Library
Action is needed to update existing property set libraries to the new access control permission model. Note that after the new permission model has been applied, all project admins in the project will be able to see and edit the library. Also, the previous implicit access control rules that stated that users who have the same company membership can edit property sets while other project users can only view property sets, will be replaced with access levels that are explicitly defined by the project admin for each user group.
As a project admin, follow these steps:
- Open the Property Set Manager panel and select a library
- Click either the new Manage access control icon, or the text from the property set details:

- A message about the new permission model is displayed:

- Click Use new permissions model.
- The Access Control Manager panel is displayed. Set the permissions as described in the How to Manage Access Control section.
- Click Save. A draft of the permissions is saved and the Access Control Manager panel closes.
- Click Publish to apply the changes. Note: If publish is not clicked, then changes will be discarded when moving away from the page and the message about the new permission model will be displayed again the next time when the Access Control Manager panel is accessed.
How to Manage Access Control
All project admins in the project can manage access control of all libraries in the project.
As a project admin, follow these steps:
- Open the Property Set Manager panel and select a library
- Click either the new Manage access control icon, or the “Manage access control” link in the property set details panel
- The Access Control Manager panel opens:
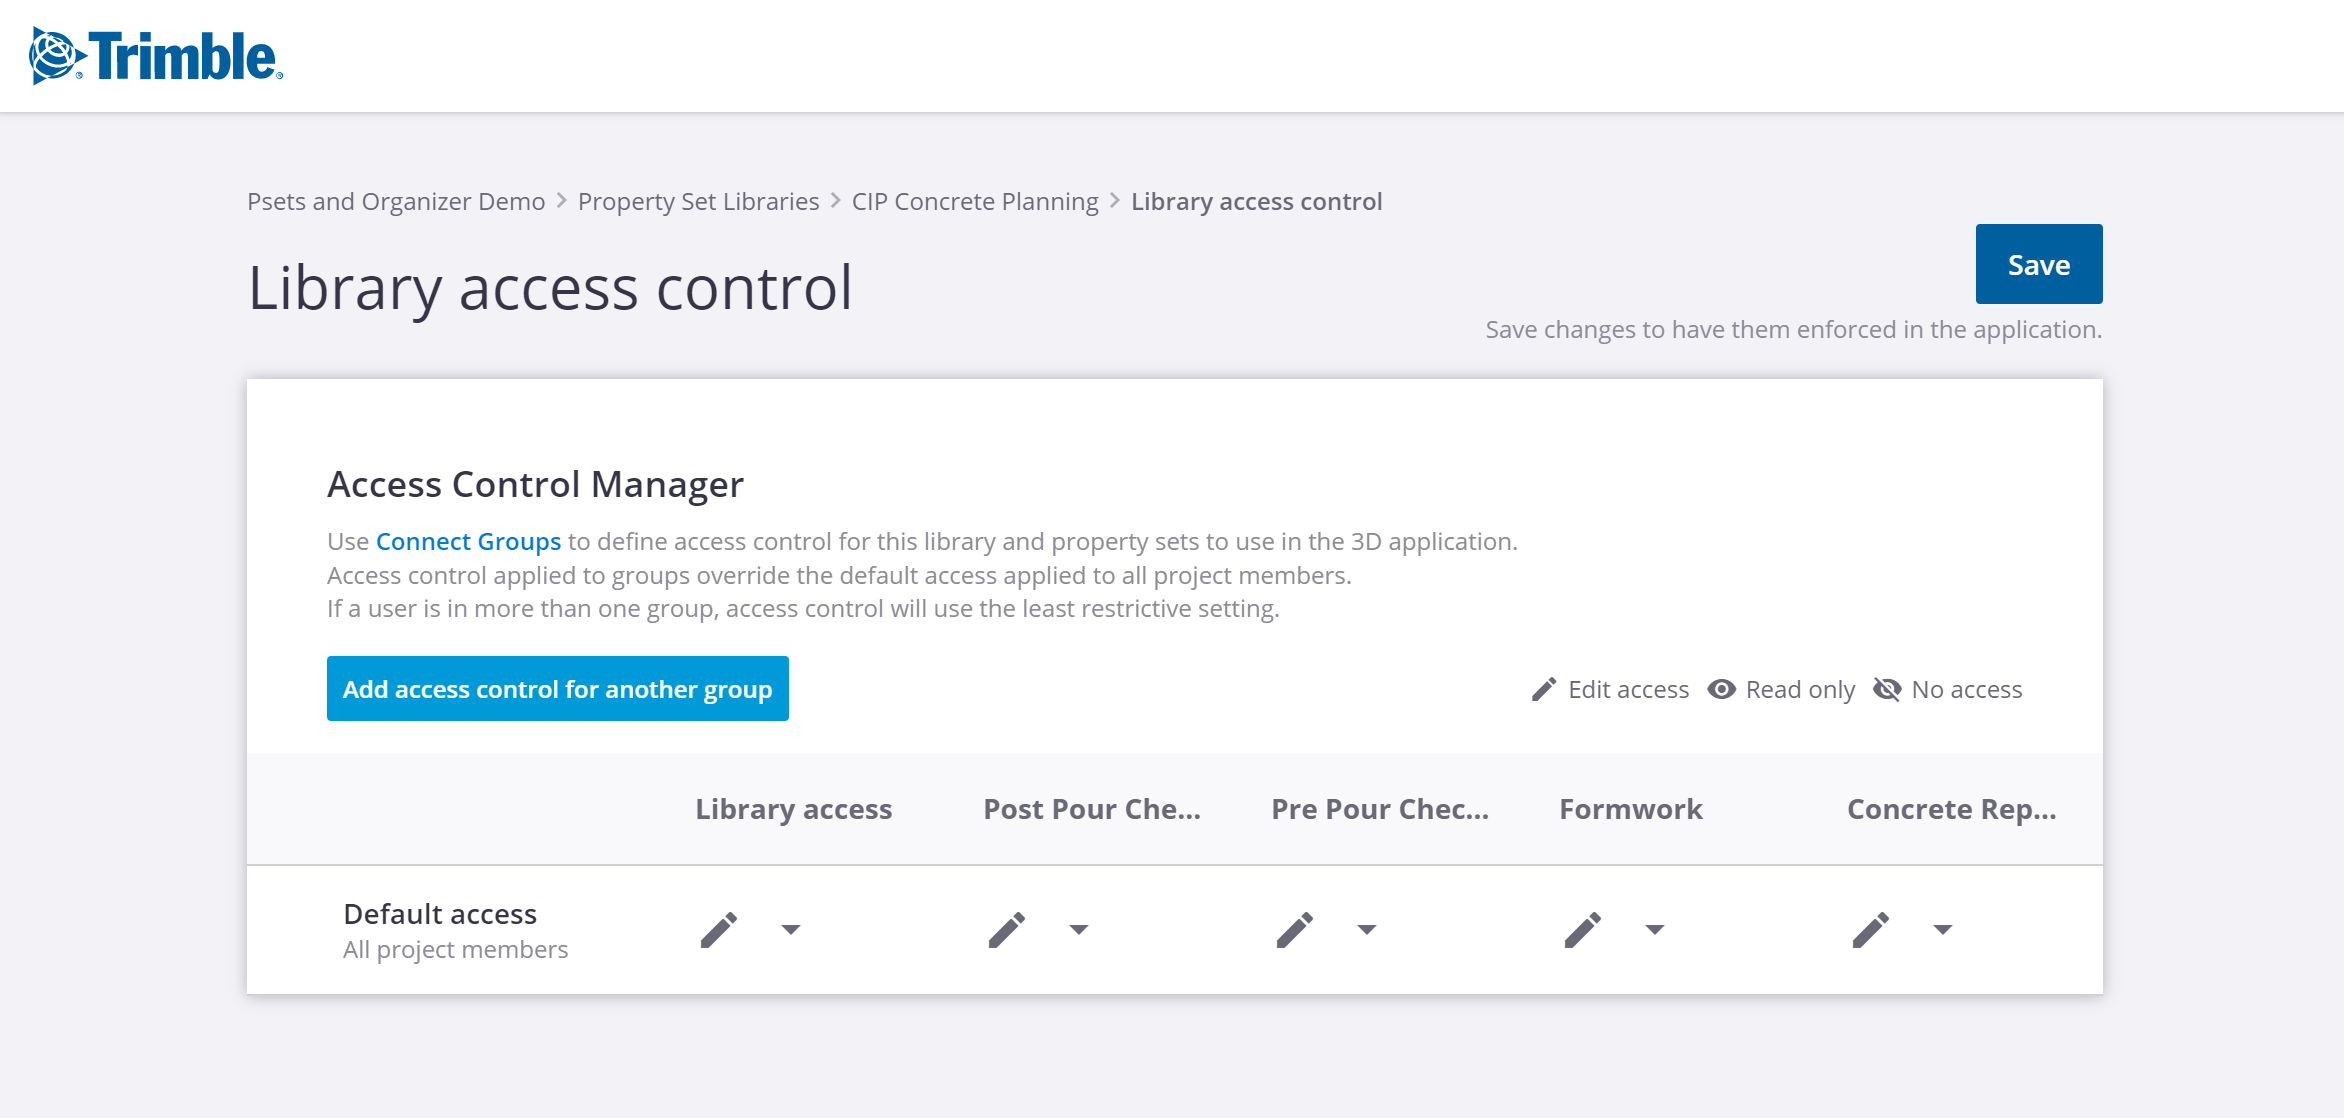
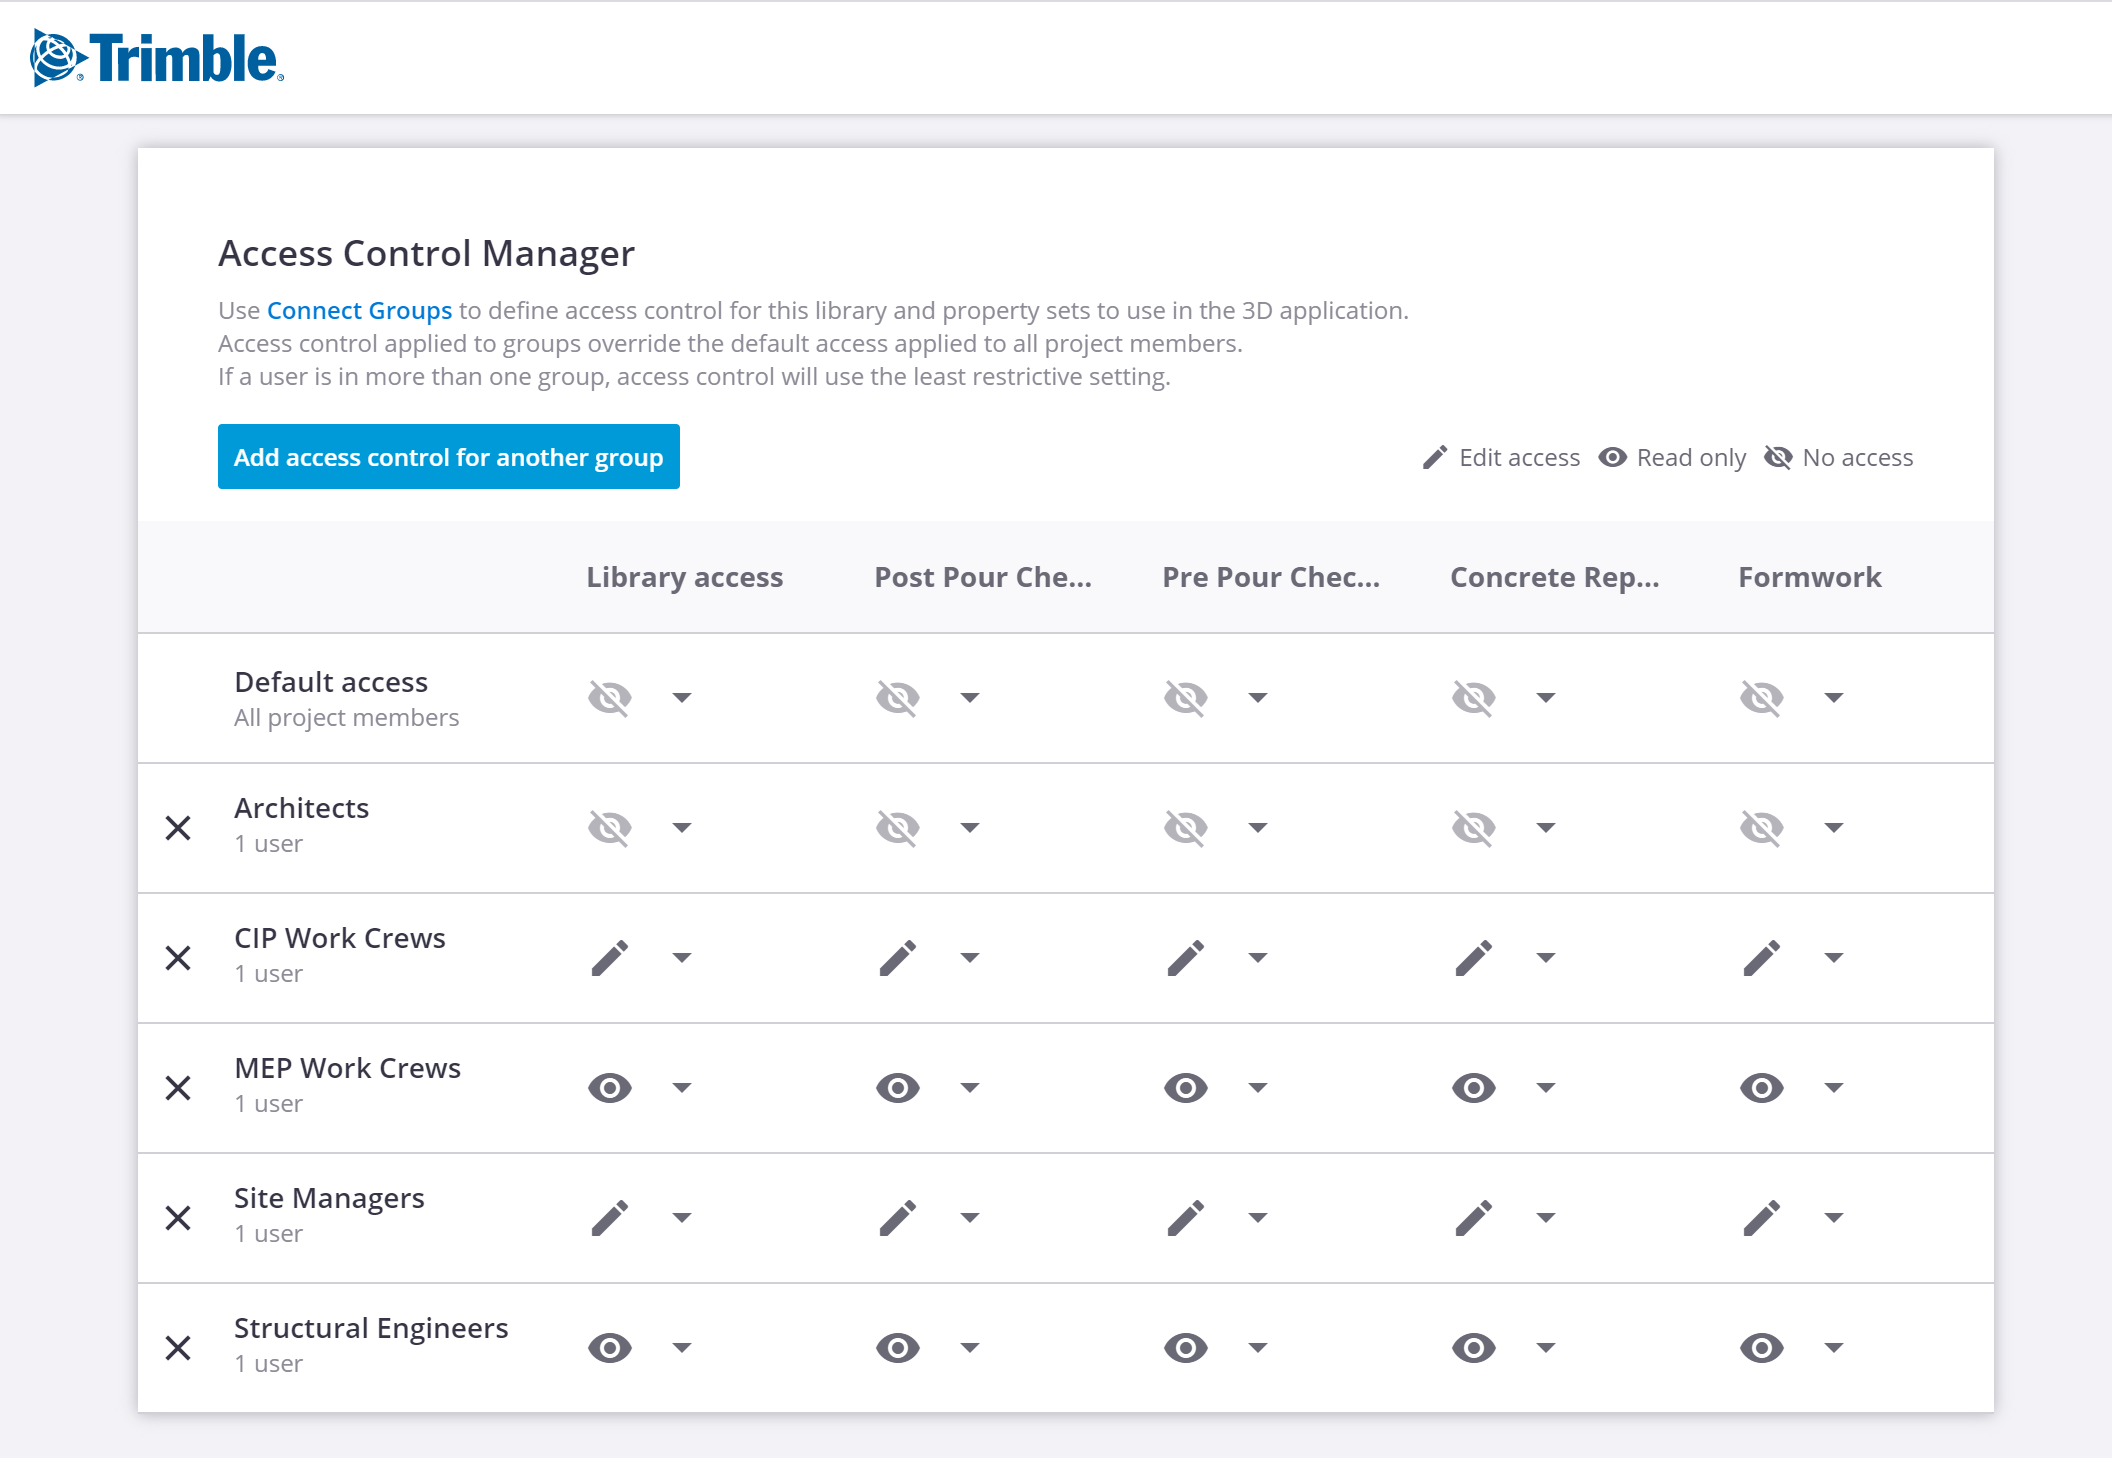
The Access Control Manager panel is organized into a grid view where there is one column for each property set in the library and one row for each user group to which access has been granted. The access level granted to a property set for each user group can then be selected from three possible values: Edit access, Read only access and No access. Their meaning is as follows:
- Edit access means that members of the user group can add the property set to model objects and edit the property set values in the Connect 3D Viewer
- Read only access means that members of the user group can only see the property sets that have been added to model objects but they cannot edit the property values
- No access means that the property set is hidden from the members of the user group in the Connect 3D Viewer
There is one column with a special meaning. The first column is always labeled as “Library access”. The meaning of this column is twofold: Firstly, it serves as a quick way to set the access levels for the whole row to the same value without having to click each column’s value separately. Secondly, it sets the default access level that is given to new property sets that are created to the library.
- Initially, the access control manager grid has only one row that is labeled as “Default access”. This row represents the access level that is granted to all project members unless a more specific rule can be found from the rows below. In other words, all users who don’t belong to any user group, or are members of a group but no access control rule has been defined for the group, get their access based on the values on this row.
- Click the Add access control for another group button. A dialog box opens:
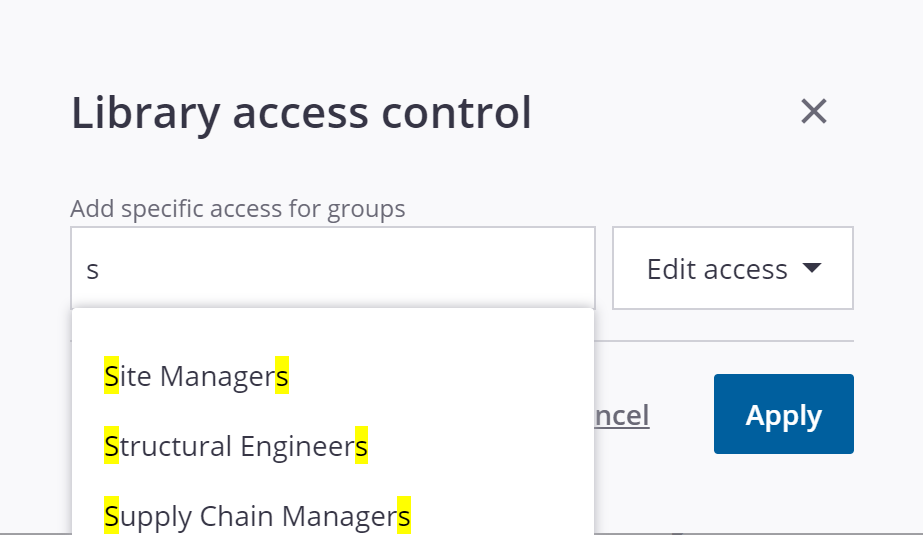
- Start typing a name of a user group and select the correct group from the auto suggestions. Click Apply.
-
Note: The Connect user groups are managed in the Team page that can be accessed by following the link in the Access Control Manager page. There must be at least one user group defined before it can be added into the access control manager grid.
- Add all needed user groups into the grid view and set the access level for each user group and property set.
- In the example below, the default access for the post and pre pour checklists is hidden but CIP Work Crews and Site Managers have edit access.

- Note that users who are given edit access are required to have the Business Premium license to be able to edit the values.
Delay Before Access Control Changes Become Effective
If the edits include changes in the user groups or in the project admin role, then there is a 15 minute delay after the publish before the changes become effective. For example, after assigning a user to a group, it takes up to 15 minutes before the user will see the effect of the change.
Maximum Access Control Policy Size
There is a maximum size for the access control policy document that is created based on the settings made in the Access Control Manager panel. The exact size of the policy document varies based on the details of the access control settings so it is impossible to give a unique amount of property sets and user groups after which the size limit is reached. However, typically adding up to 10 property sets and up to 30 user groups per property set library can be fitted. If the maximum size of the policy is exceeded, then saving changes in the Access Control Manager panel will fail with an error message. If more user groups and/or property sets are needed, then a new library must be created.
#Release_Notes
#Trimble_Connect
#Trimble_Connect_Browser
#3D_Viewer
#Product_Updates