TBC Macros and Extensions

 View Only

 Draping line on surface

Andrea Zanetti's profile image
Andrea Zanetti posted 11-16-2023 08:00

Hi,

I am trying to drape a line to a surface. Anyone can suggest me the function to use and a short code example?

Thanks in advance

Quan Mueller's profile image
Quan Mueller

I presume you need to do this in a TML - instead of just using the Drape Object On Surface command?

It creates Draped Lines and Draped Points, supports multi-selection, and is located at:

Ribbon tab: Surfaces
Group: Create
2nd column from left (top of column) "Drape Objects"
 
Ribbon tab: Drill Pile Compact
Group: CAD
Right-hand column (middle) "Drape Objects"
ANZ Toolbox's profile image
ANZ Toolbox

Hey Andrea,

The easiest way is to use the DrapedLine class (Trimble.Vce.Alignment.DrapedLine). Just create an instance as usual by adding to a container... then set the ReferenceGeometrySerialNumber member to the serial number of your original line and the SurfaceSerialNumber member to the serial number of your surface.

DrapedLine implements the IHorizontalPolyseg and IVertialPolyseg interfaces so you can just treat it like a regular polyseg with geometry.

Let me know if this doesn't answer your question.

Cheers,

Dylan.

Andrea Zanetti's profile image
Andrea Zanetti

Hi Dylan,

I understand the meaning but the code I wrote as you suggested is not working. I am still a beginner so if you can help with an example would be appreciated.

Thanks

ANZ Toolbox's profile image
ANZ Toolbox

I've attached a small working example.

Ronny Schneider's profile image
Ronny Schneider

I do stand corrected, Dylans code won't crash the Project Explorer in case of an error.

It isn't the AddBeginMark/AddEndMark that needs to be in pairs.

It is 

UIEvents.RaiseBeforeDataProcessing(self, UIEventArgs())
UIEvents.RaiseAfterDataProcessing(self, UIEventArgs())

that you have to make sure that they'll both be executed and in the correct order.

And it's not the try that reverts things, it is the "with as failGuard" block. I.e. if you have code there that draws something on the screen right before an error occurs, it won't show.

The real pity is that the macro language was released with TBC V5.00 in 2018!!!!!, and we still don't have a decent documentation for it.

I have no idea what UIEvents.RaiseBeforeDataProcessing/RaiseAfterDataProcessing really do and why they must be executed as pair in the correct order or what AddBeginMark/AddEndMark do, and why they obviously don't need to be executed as pair. Cumbersome and time-consuming trial and error.

I haven't tested Dylans macro, I just want to add a comment regards the use of AddBeginMark.

In his code with try and finally you should move the AddBeginMark in front and outside of the try block. In case of an error inside the try block everything, including the AddBeginMark, would be reverted. But finally will always be executed and the AddEndMark will be set. That will crash the Project Explorer, since you always need to set them as "pair", you shouldn't set an EndMark without having a BeginMark first, at least until V5.91. But I doubt that the new version is more forgiving. You can do it, but the Project Explorer will be empty, and the user would have to restart TBC.

ANZ Toolbox's profile image
ANZ Toolbox

 "In case of an error inside the try block everything, including the AddBeginMark, would be reverted."

@Ronny Schneider that's not how try...finally blocks work in Python.

Python does not automatically revert the effects of code that has run in a try block when an exception occurs. The execution of the try block is interrupted as soon as an exception is raised, and control is passed to the except block (if an appropriate one exists) or to the finally block. However, any operations that were successfully completed in the try block before the exception was raised are not magically undone.

The AddBeginMark() call could be put outside the try but seeing as it's the first call inside it it doesn't really matter. The only way it could cause problems is if the call to AddBeginMark() itself threw an exception.

If you wanted to be extra pedantic then each one of those other pairs of corresponding calls (to the UIEvents and wv) should probably have their own try...finally clauses.

In any case we're muddying the waters here a bit. Andrea is a self-professed beginner and the real purpose of the example was to show how to use the DrapedLine class.

Andrea Zanetti's profile image
Andrea Zanetti

Hi Dylan and Ronny,

I really appreciate your help and comments. I thought I was the only one who couldn't find the documentation!
 
Dylan, I was finally able to try your macro but it doesn't seem to work. I draw a polyline on a dtm, apply your macro but the line remains with undefined elevation. Am I doing something wrong?
 
When initializing TBC I noticed an error at line 54 on Trimble.Sdk.Interfaces.UI. Does it depend on my version of TBC? I have 5.90
Ronny Schneider's profile image
Ronny Schneider

Unfortunately the imports do depend on your TBC version.

For V5.90 you need to change lines 54+55 to

Besides that, the code does work for me.

ANZ Toolbox's profile image
ANZ Toolbox

Hi Andrea,

The macro is written for 2023.1 (you should upgrade).

I'm not sure how you are "Applying the macro" at all if it is failing with that initialization error. It won't be loading at all. When it loads correctly (in latest TBC) it will show in the command pane like this:
Dylan.

Andrea Zanetti's profile image
Andrea Zanetti

now it works. however, isn't it strange that in the line properties there is no minimum and maximum elevation?

Ronny Schneider's profile image
Ronny Schneider

You haven't selected the draped line, it's not highlighted (standard would be thick orange). You've probably still selected and highlighted your polyline that has the elevation set to undefined.

The draped line shows up as "Draped Line" in the properties pane.

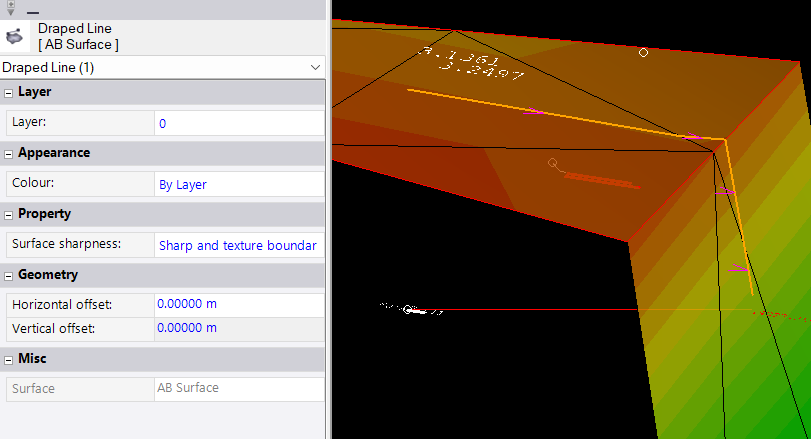
But it doesn't show the max/min elevation as a normal stringline. In theory it could, but for this dependent object the programmers obviously thought it's not necessary.

The draped line will update its shape as soon as you change the shape of the original linestring or the shape of the surface.

You can convert it to a normal linestring with the explode command from the Cad-Tab.

Another option would be, instead of creating a "DrapedLine" object with the macro, to create an independent "Linestring" object and use the information which can be retrieved with the Model3D.Profile method. That one is provided by the selected surface itself, we just need to get it as an object.

Add the following code just above failGuard.Commit() and you'll get 2 lines, a dependent "Draped Line" and an independent "Line String".

                surface = wv.Lookup(self.entitySurface.SelectedSerial) # we get our selected surface as object
                # a PolySeg is an object that contains just the geometry information, it is only used for further computations and has no influence on TBC
                polyseg_org = lineEntity.ComputePolySeg()         # we get us the horizontal information of the selected line
                polyseg_org = polyseg_org.ToWorld()               # just in case the line is defined in a UCS we convert it to World
                polyseg_draped = surface.Profile(polyseg_org, True)    # we use the method Profile that is provided by the surface object to retrieve
                                                                # the draped polyseg information, the True lineaerizes the line first, it must be linear anyway

                l = wv.Add(clr.GetClrType(Linestring))          # we create a new line object in the world view
                l.Append(polyseg_draped, None, False, False)    # we fill it with the horizontal and vertical geometry information
                                                                # bool useVerticalOverrideIfConstantElevation, bool zeroBecomes2D
                # in this case, a draped line on a surface, the polyseg is made up from straight segments, where each segment end
                # also has the one and only height information, you can compare that with a standard, straight element, stringline where you don't
                # add additional information to the vertical tab
                # that's the reason why we have that None there, in this specific case we don't need to add any additional vertical profile information 
                l.Layer = lineEntity.Layer
Andrea Zanetti's profile image
Andrea Zanetti

great! how did you learn all this?

Ronny Schneider's profile image
Ronny Schneider

Lacking a decent documentation it was studying the few Trimble macros that come with TBC and after that it was months of scrolling/reading/searching in the Visual Studio Object browser and lots of trial and error.

And then, there are not much more than a handful of people here on the forum that may be able to give you a hint.

The only person from Trimble that did occasionally post in this specific forum was Gary Lantaff. But if my information is correct, he retired around May this year. So, the already sparse official support, for an actively promoted and advertised feature of TBC, is now basically not existing anymore.

Fernando Calvo's profile image
Fernando Calvo

Ciao Andrea,

as Ronny says, unfortunately you will need many many months to get deeper into the TML´s programming due to the lack of documentation. I would also recommend you to start checking and going through the Trimble macros that you find on the MacroCommands or MacroCommands3 folders.

Then, checking as Ronny says the Object Explorer inside Visual Studio (don´t forget to add the needed references), and then it´s a matter of trial-error, so if you want / need to create sofisticated macros, you´ll need to invest a lot of time.

Regards,

Fernando